How To Temper Steel In Oven And Do It The Right Way
Tempering steel in an oven is the best way to reduce brittleness after hardening. This process uses controlled heat to balance hardness and toughness, making your steel parts stronger and more durable. Whether you are working with carbon steel or a steel alloy, this guide covers everything you need to know. Follow along to learn the right temperatures, timing, and common mistakes to avoid.
Steel is one of the most versatile materials you can work with. From knives to tools to automotive parts, steel serves countless purposes. But raw hardened steel can be too brittle for real-world use. That is where tempering comes in. When you learn how to temper steel in oven, you unlock the ability to fine-tune the metal’s properties. You get the perfect balance of hardness and toughness. And the best part? You can do it right at home with a standard kiln or heat treat oven.
This guide walks you through every step of the tempering process. You will learn what tempering actually does to steel at the molecular level. You will discover the right temperatures for different types of steel. And you will find practical tips that save you time, money, and frustration. Whether you are a hobbyist or a maker, this article gives you everything you need to temper steel confidently.
Key Takeaways
- Tempering reduces brittleness: After hardening steel through quenching, tempering in an oven restores some toughness without losing too much hardness.
- Temperature matters a lot: Different tempering temperatures produce different levels of hardness and toughness in the steel.
- Use an oven thermometer: Accurate temperature control is essential for consistent, reliable results every time.
- Soak time is key: Holding the steel at the target temperature long enough ensures even heat distribution throughout the piece.
- Avoid common mistakes: Rushing the process, skipping the oven preheat, or using the wrong temperature can ruin your steel parts.
- Cooling method counts: Air cooling after tempering is usually the safest and most effective approach for oven tempering.
- Practice makes perfect: Start with scrap pieces to dial in your process before working on your final parts.
📑 Table of Contents
What Is Steel Tempering And Why Does It Matter
Tempering is a heat treatment process that follows hardening. When you harden steel, you heat it up and then cool it down very quickly, usually by quenching in oil or water. This rapid cooling creates a very hard but brittle structure inside the steel called martensite. Hardness is great, but brittleness is a problem. A brittle steel part can crack or shatter under impact.
Tempering solves this problem. By reheating the hardened steel to a specific temperature below its critical point, you allow the internal structure to change. The martensite transforms into a more stable form that is still hard but much less brittle. This is the whole point of the tempering process. You are essentially giving the steel a second chance to find its balance.
The importance of tempering cannot be overstated. Without it, many steel tools and parts would fail under normal use. A knife that is too hard will chip. A spring that is too brittle will snap. Tempering gives you control over the final properties of the steel. You decide how hard versus how tough you want the finished piece to be.
There is also a close relationship between tempering and annealing. Annealing is a different heat treatment that softens steel fully. Tempering, on the other hand, keeps the steel relatively hard while adding toughness. Understanding this distinction helps you choose the right process for your project.
The Science Behind Tempering
When steel is quenched, the carbon atoms inside the iron lattice get trapped in a rigid structure. This is what makes the steel hard but brittle. During tempering, heat gives those carbon atoms enough energy to move slightly and form new structures. The higher the tempering temperature, the more the internal structure changes. Lower temperatures keep more hardness. Higher temperatures increase toughness but reduce hardness.
Steel alloys behave differently during this process. A simple carbon steel responds differently than a complex alloy steel with chromium, nickel, or vanadium. This is why knowing your specific steel type matters so much. The alloying elements change how the steel responds to heat treatment and what final properties you can achieve.
One thing to watch for is thermal shock. Rapid temperature changes can cause cracking or warping. This is why oven tempering is so popular. An oven provides gentle, even, and controlled heat. It avoids the sudden temperature swings that can damage the steel.
Understanding The Tempering Process
Before you start, it helps to understand the full picture of what happens during oven tempering. The process has three main phases. Each phase plays a specific role in achieving the desired steel properties.
The first phase is preheating. You bring the oven up to the target tempering temperature before the steel goes in. This ensures the heat is stable and consistent. Putting cold steel into a hot oven creates uneven heating, which can cause warping or cracking.
The second phase is the soak. This is when the steel sits at the target temperature for a set amount of time. During the soak, heat penetrates the entire piece evenly. The internal structure begins to transform. The length of the soak depends on the size and thickness of the steel part.
The third phase is cooling. After the soak, you take the steel out and let it cool. For most oven tempering, air cooling works perfectly. You place the hot steel on a wire rack or heat-resistant surface and let it come to room temperature naturally. Avoid quenching after tempering unless you have a specific reason to do so.
How Tempering Differs From Other Heat Treatments
It is easy to confuse tempering with other heat treatments. Here is a quick breakdown of how tempering compares to related processes:
- Annealing: Heats steel to a high temperature and cools it slowly. The goal is to soften the steel fully for machining or forming.
- Quenching: Heats steel and then cools it rapidly. The goal is to maximize hardness by creating martensite.
- Tempering: Reheats quenched steel to a lower temperature. The goal is to reduce brittleness while keeping most of the hardness.
- Normalizing: Heats steel and then cools it in still air. The goal is to refine the grain structure and improve uniformity.
Each process serves a different purpose. Tempering specifically addresses the brittleness problem that comes after quenching. It is the bridge between extreme hardness and practical durability.
For those interested in stress relief, tempering also serves that purpose. Stress relief is a gentle tempering process that reduces internal stresses without significantly changing hardness. It is often used for welded or machined steel parts that need dimensional stability.
How To Temper Steel In Oven: Step-By-Step Guide
Now let us get into the practical steps. This is the core of the process. Follow each step carefully for the best results.
Step 1: Prepare Your Steel Part
Start by cleaning your steel part thoroughly. Remove any grease, oil, dirt, or scale. Contaminants can cause problems during heating. They may create spots on the surface or affect how the steel responds to heat.
Inspect the part for any cracks or defects. Tempering will not fix existing problems. If the steel has flaws, they may become more visible or worse after heat treatment. It is better to catch issues before you start.
If the steel has been freshly quenched, make sure it is fully hardened before tempering. You can test this with a file or a hardness tester. A properly hardened steel should resist filing at the surface.
Step 2: Preheat Your Oven
Set your oven to the target tempering temperature. Use a reliable oven thermometer to verify the actual temperature inside. Many ovens have inaccurate thermostats, and this can ruin your tempering results.
Let the oven stabilize at the target temperature before placing the steel inside. This usually takes 15 to 30 minutes depending on the oven. A well-preheated oven ensures even heat distribution from the moment the steel goes in.
Place the steel on a wire rack or ceramic shelf. Do not let the steel touch the oven walls or floor directly. Contact with metal surfaces can create hot spots and uneven tempering.
Step 3: Load The Steel And Start Timing
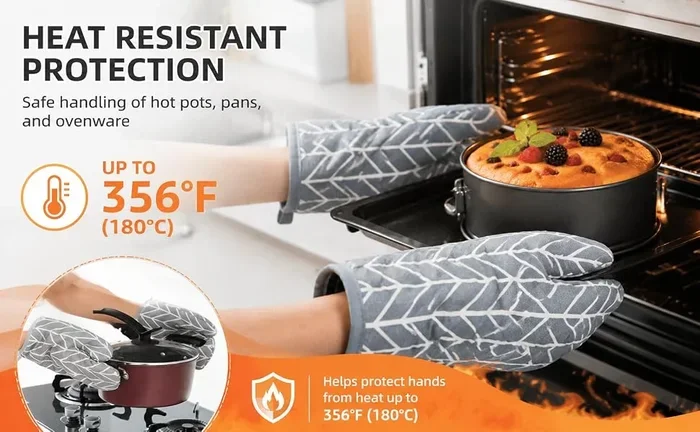
Once the oven is at temperature, place the steel inside carefully. Use heat-resistant gloves. Close the door gently to avoid thermal shock from sudden air pressure changes.
Start your timer once the oven returns to the target temperature. This is important. Opening the door to load the steel causes a temperature drop. The timer should begin after the oven recovers, not when you shut the door.
For small parts, a 1-hour soak is usually sufficient. Larger or thicker pieces may need 2 hours or more. The goal is for heat to penetrate the entire cross-section of the steel evenly.
Step 4: Monitor The Temperature
Do not walk away and forget about the oven. Check the temperature periodically. If your oven runs hot or cold, you may need to adjust the set point slightly.
An oven thermometer placed near the steel gives you the most accurate reading. Some people use a thermocouple with a digital display for even better precision. This is especially important if you are working with tight hardness tolerances.
Keep the oven door closed as much as possible. Every time you open it, the temperature drops and the recovery time affects your soak consistency.
Step 5: Remove And Cool The Steel
When the soak time is complete, turn off the oven. Let the steel cool inside the oven with the door slightly ajar. This provides a gentle, controlled cooling environment.
Alternatively, you can remove the steel once the oven cools to around 200 degrees Fahrenheit. Use heat-resistant gloves and place the steel on a wire rack. Let it air cool completely to room temperature before handling further.
Do not quench the steel after tempering. Quenching at this stage can create new internal stresses or even crack the part. Air cooling is safe, simple, and effective.
Step 6: Check The Results
Once the steel is cool, inspect it visually. Look for any discoloration, warping, or surface changes. The tempering colors that appear on steel are actually a useful indicator. Different colors correspond to different levels of hardness and oxide thickness on the surface.
You can also test the hardness with a file or a hardness tester. The steel should be hard enough for its intended use but not so hard that it chips or cracks easily. This is the sweet spot you are aiming for.
If the results are not what you expected, you can re-temper the steel. Simply repeat the process at a slightly different temperature. Each temper cycle gives you another chance to dial in the properties.
Tempering Temperatures For Different Steel Types
Not all steel responds the same way to tempering. The right temperature depends on the type of steel you are working with and the properties you want in the finished part. Here is a practical guide to help you choose.
Low Carbon Steel Tempering
Low carbon steel is relatively soft and ductile even after hardening. Tempering at lower temperatures, around 300 to 400 degrees Fahrenheit, works well for most applications. This range preserves a good balance of softness and toughness. It is commonly used for general-purpose parts that do not need extreme hardness.
Medium Carbon Steel Tempering
Medium carbon steel is the most common type for tempering. This includes steels like 1045, 1050, and 1060. For these steels, tempering temperatures between 400 and 600 degrees Fahrenheit produce excellent results. Lower temperatures in this range keep more hardness. Higher temperatures increase toughness and reduce the risk of cracking.
If you are making knives from medium carbon steel, a temper at 400 to 425 degrees Fahrenheit is a popular choice. It gives a good edge retention while keeping the blade tough enough to handle normal use without chipping.
High Carbon Steel Tempering
High carbon steels like 1075, 1080, and 1095 are very hard when quenched. They are also very brittle. Tempering at 350 to 450 degrees Fahrenheit reduces brittleness while maintaining excellent hardness. These steels are popular for leaf springs, razors, and high-performance cutting tools.
Some makers use a two-stage tempering process with high carbon steel. They temper at a lower temperature, cool, then temper again at the same temperature. This helps ensure the internal stresses are fully relieved and the properties are consistent throughout the part.
Tool Steel Tempering
Tool steels like D2, O1, and A2 have their own tempering guidelines. These steels contain alloying elements that change how they respond to heat. Always check the specific tempering recommendations for your tool steel grade. General guidelines suggest tempering between 350 and 600 degrees Fahrenheit depending on the desired hardness.
Tool steel tempering often requires more precise temperature control. Even a 25-degree difference can change the final hardness noticeably. Investing in a good oven thermometer or a digital temperature controller pays off here.
| Steel Type | Tempering Range | Approximate Hardness After Tempering | Common Uses |
|---|---|---|---|
| Low Carbon (1018-1020) | 300-400 F | 120-180 Brinell | General parts, brackets |
| Medium Carbon (1045-1060) | 400-600 F | 20-50 HRC | Knives, tools, shafts |
| High Carbon (1075-1095) | 350-450 F | 55-65 HRC | Springs, razors, blades |
| Tool Steel (D2, O1, A2) | 350-600 F | 55-65 HRC | Cutting tools, dies |
| Spring Steel (5160, 9255) | 350-450 F | 45-50 HRC | Springs, clips |
Use this table as a starting point. Your exact results may vary based on the specific composition of the steel, the quenching medium used, and the oven you are working with. Always test on scrap pieces first when possible.
Common Mistakes To Avoid When Tempering Steel In An Oven
Even experienced makers make mistakes when tempering steel. Knowing what to avoid saves time, material, and frustration. Here are the most common errors and how to prevent them.
Skipping The Preheat
Some people throw cold steel into a cold oven and then crank up the heat. This is a recipe for disaster. The uneven heating causes thermal stress inside the steel. The outside heats faster than the inside. This can lead to warping or cracking. Always preheat the oven to the target tempering temperature before loading the steel.
Using An Inaccurate Oven Thermometer
Your oven’s built-in thermostat is not always reliable. Many home ovens can be off by 25 to 50 degrees. That is a huge margin when tempering steel. A cheap oven thermometer from a hardware store is an easy fix. For even better accuracy, use a thermocouple probe. The small investment pays off in consistent results.
Not Soaking Long Enough
The soak time matters. If you pull the steel out too early, the heat has not fully penetrated the center of the part. The outside may be tempered while the inside is not. This creates uneven properties and potential failure points. Follow recommended soak times based on the thickness of your steel.
Quenching After Tempering
After tempering, always air cool. Quenching tempered steel can cause cracking and reintroduce brittleness. The whole point of tempering is to create a stable, balanced structure. Quenching after tempering disrupts that balance and can undo your work.
Ignoring Temper Colors
The rainbow colors that appear on steel during tempering are not just cosmetic. They tell you the approximate temperature the surface reached. Light straw color indicates a lower temper. Blue or purple suggests a higher temper. Watching for these colors helps you verify that your oven is actually reaching the right temperature.
Tempering In A Dirty Or Cluttered Oven
Oil residue, scale, or debris in the oven can contaminate the steel surface. It may create spots, discoloration, or even affect the steel’s performance. Clean your oven before tempering. Use a damp cloth to wipe down the interior and remove any loose debris.
Tips For Getting Perfect Results Every Time
Getting consistent, repeatable results when tempering steel takes practice. But a few pro tips can accelerate your learning curve significantly.
First, keep a tempering log. Write down the steel type, the tempering temperature, the soak time, and the results. Over time, this log becomes a valuable reference. You will start to see patterns and preferences for specific steel types. It is the fastest way to build your knowledge and improve your process.
Second, use a wire rack instead of placing steel directly on the oven shelf. A wire rack promotes airflow around the part. This leads to more even heating. It also prevents the steel from sticking to the shelf or developing flat spots from gravity while hot.
Third, temper in batches when possible. If you have multiple parts that need the same tempering temperature, process them together. This ensures they all receive the same treatment. It is also more efficient with your time and energy.
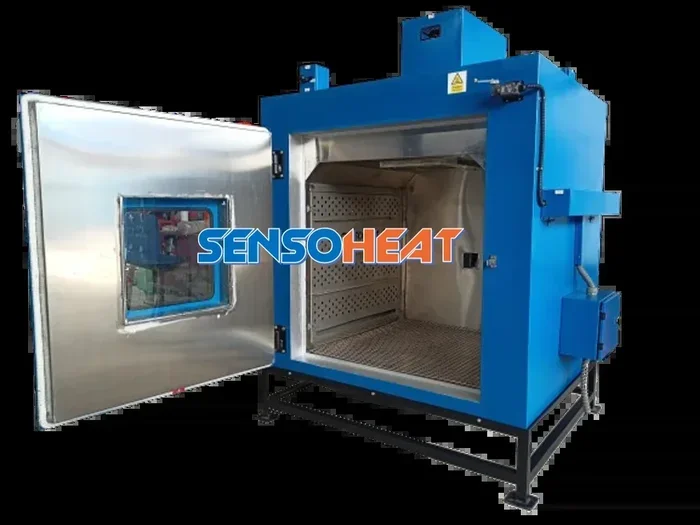
Fourth, consider investing in a kiln or a dedicated heat treat oven. A standard kitchen oven works for basic tempering. But a kiln gives you better temperature uniformity and more precise control. For serious knife makers or tool enthusiasts, this upgrade makes a noticeable difference.
Fifth, always let the steel cool slowly after tempering. Place it on a heat-resistant surface away from drafts. Avoid placing hot steel on cold surfaces like granite or metal tables. The sudden temperature difference can cause thermal shock and cracking.
Finally, practice on scrap pieces before committing to your final parts. Every oven is different. Every batch of steel is slightly different. Running test pieces helps you understand how your specific setup behaves. It builds confidence and reduces waste.
Safety Tips For Oven Tempering
Tempering steel in an oven involves high temperatures. Safety should always come first. Wear heat-resistant gloves when handling hot steel. Use safety glasses to protect your eyes from any sparks or scale that may flake off. Work in a well-ventilated area to avoid inhaling any fumes from heated oil or surface contaminants.
Keep a fire extinguisher nearby when working with any heat treatment process. While oven tempering is relatively safe compared to forge work, it is always wise to be prepared. Keep your workspace clean and free of flammable materials.
Never leave a tempering oven unattended for long periods. While modern ovens have safety shutoffs, it is still good practice to monitor the process. Check on the oven periodically to ensure everything is running smoothly.
Conclusion
Learning how to temper steel in oven opens up a world of possibilities for makers, hobbyists, and professionals alike. The process is straightforward once you understand the basics. You heat the steel to a specific temperature, hold it there long enough for the heat to penetrate fully, and then let it cool gently. The result is steel that is hard enough to hold an edge or bear a load, yet tough enough to handle real-world use without cracking or breaking.
The key to success is attention to detail. Preheat your oven properly. Use a reliable thermometer. Follow the right tempering temperature for your specific steel type. Respect the soak time. And always cool the steel slowly and safely. These small habits make a big difference in the quality of your finished parts.
Start with simple projects and low-cost steel. Build your confidence and refine your technique. As you gain experience, you will develop an intuition for how different steels respond to different tempering temperatures. The tempering process is as much art as it is science, and every session teaches you something new.
Remember, tempering is what transforms a brittle, hard piece of steel into a reliable, functional tool. Take your time, follow the steps, and enjoy the process. With practice, you will achieve consistent, excellent results every time you temper steel in your oven.
Frequently Asked Questions
Can I temper steel in a regular kitchen oven?
Yes, a regular kitchen oven can work for tempering steel. However, kitchen ovens are not always temperature accurate. Use an independent oven thermometer to verify the actual temperature inside. Also, make sure your oven can reach and maintain the tempering temperature you need. Most kitchen ovens handle tempering in the 300 to 600 degree Fahrenheit range just fine.
How long should I temper steel in the oven?
For most small to medium parts, one hour at the target temperature is sufficient. Thicker or larger pieces may need two hours or more. The goal is for heat to penetrate the entire cross-section evenly. If you are unsure, err on the side of a longer soak rather than a shorter one.
Can I temper steel multiple times?
Yes, you can re-temper steel if the first attempt does not give you the desired results. Simply repeat the process at a slightly different temperature. Keep in mind that each temper cycle may slightly change the final properties. Document your attempts so you can track what works best.
What is the difference between hardening and tempering steel?
Hardening makes steel very hard but brittle. It involves heating the steel to a high temperature and then quenching it rapidly. Tempering follows hardening and reduces brittleness while keeping most of the hardness. You reheat the hardened steel to a lower temperature and cool it slowly. Think of hardening as making the steel strong and tempering as making it balanced.
Do I need a special oven for tempering steel?
A dedicated heat treat oven or kiln gives the best results. But a standard kitchen oven works for basic tempering. The most important factor is temperature accuracy and consistency. If your kitchen oven holds temperature well and you use an oven thermometer, you can achieve good tempering results at home.
Why does steel change color when tempering?
The colors that appear on steel during tempering are caused by oxidation of the surface. Different thicknesses of iron oxide produce different colors. Light straw indicates lower temperatures, while blue and purple indicate higher temperatures. These tempering colors are a useful visual indicator of the approximate surface temperature the steel has reached.