How Long To Cook Ribs In Nuwave Oven For Perfect Results
Cooking ribs in a Nuwave oven is fast, easy, and delivers restaurant-quality results at home. This guide covers exact cooking times, temperatures, and techniques for every rib type. You will learn how to achieve fall-off-the-bone tenderness without drying out your meat. Whether you prefer baby back ribs or spare ribs, we have you covered with step-by-step instructions and expert tips.
There is nothing quite like the aroma of slow-cooked ribs filling your kitchen. If you own a Nuwave oven, you already have a powerful tool that can deliver restaurant-quality ribs right at home. Many people wonder exactly how long to cook ribs in Nuwave oven settings, and the answer depends on a few key factors.
This guide breaks down everything you need to know. From choosing the right cut to nailing the perfect internal temperature, we cover it all. You will walk away confident and ready to cook ribs that impress everyone at your table.
Key Takeaways
- Baby back ribs cook in 2.5 to 3 hours at 300°F in a Nuwave oven for the best results.
- Spare ribs need about 3.5 to 4 hours due to their thicker cut and more connective tissue.
- Always use a meat thermometer to check that ribs reach an internal temperature of 195°F to 205°F.
- Wrapping ribs in foil partway through cooking keeps them moist and speeds up tenderizing.
- Let ribs rest for 15 to 20 minutes after cooking to lock in juices and improve texture.
- Preheating your Nuwave oven ensures even cooking and better flavor development from the start.
- Basting every 45 minutes adds layers of flavor and helps create a beautiful glaze on the outside.
📑 Table of Contents
- Understanding Your Nuwave Oven for Ribs
- How Long To Cook Ribs In Nuwave Oven by Type
- Step-by-Step Guide to Cooking Ribs in a Nuwave Oven
- Temperature and Timing Guide for Perfect Ribs
- Tips for Perfectly Tender and Flavorful Ribs
- Common Mistakes and How to Fix Them
- Frequently Asked Questions
- Conclusion
Understanding Your Nuwave Oven for Ribs
The Nuwave oven is a countertop convection oven that uses infrared technology to cook food evenly and efficiently. It circulates hot air around the meat, which means you get consistent results every time. Unlike a traditional oven, the Nuwave oven heats up fast and uses less energy.
When you are cooking ribs in a Nuwave oven, the even heat distribution is a game changer. You do not have to worry about hot spots or uneven cooking. The oven’s precise temperature control lets you set it and forget it, which is perfect for low and slow rib cooking.
Why the Nuwave Oven Works Great for Ribs
Ribs need time and gentle heat to break down the connective tissue that makes them so tender. The Nuwave oven excels at this because of its consistent airflow. Here are a few reasons why this appliance is ideal for ribs:
- Even heat distribution cooks ribs uniformly from all sides.
- Convection technology reduces cooking time compared to a standard oven.
- Compact size fits a full rack of ribs with room to spare.
- Temperature precision lets you hold a steady 300°F with minimal fluctuation.
- Easy cleanup since the oven has dishwasher-safe parts.
Understanding your oven’s strengths sets the foundation for perfect ribs every time. Once you know what your Nuwave oven can do, you can focus on the fun part — the cooking.
How Long To Cook Ribs In Nuwave Oven by Type
The cooking time for ribs in a Nuwave oven varies based on the type of ribs you are using. Different cuts have different thicknesses, fat content, and bone structures. Here is a detailed look at each popular rib type.
Baby Back Ribs
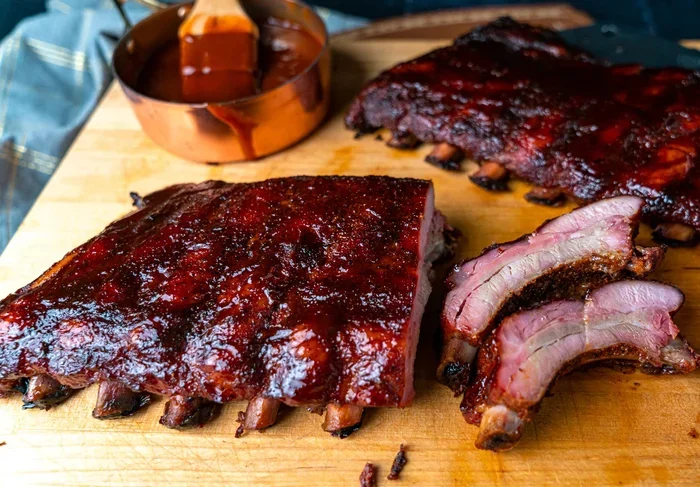
Baby back ribs are the most popular choice for Nuwave oven cooking. They are leaner, smaller, and cook faster than other cuts. Baby back ribs typically take 2.5 to 3 hours at 300°F in a Nuwave oven.
These ribs come from the top of the pig’s rib cage, near the backbone. Because they are smaller, they need less time to become tender. A full rack of baby back ribs usually weighs about 2 to 3 pounds, which fits perfectly in a Nuwave oven.
At the 2.5-hour mark, check the internal temperature. You are aiming for 195°F to 205°F for that perfect fall-off-the-bone texture. If they are not quite there yet, add 15 to 30 minutes and check again.
Spare Ribs
Spare ribs come from the belly side of the rib cage. They are thicker, meatier, and contain more connective tissue. Because of this, spare ribs need 3.5 to 4 hours in a Nuwave oven at 300°F.
These ribs are bigger and heavier, often weighing 4 to 5 pounds for a full rack. The extra meat means they need more time for the collagen to break down and turn into gelatin. This is what gives ribs that luscious, juicy bite.
Many people also ask about St. Louis-style spare ribs. These are spare ribs that have been trimmed to a uniform rectangular shape. They cook in about the same time as regular spare ribs, around 3.5 to 4 hours.
Pork Loin Back Ribs
Pork loin back ribs are smaller and leaner than baby backs. They cook even faster, usually in about 2 to 2.5 hours at 300°F. These ribs are great for smaller households or when you want a quicker cook.
Because they are lean, they can dry out faster than fattier cuts. Keep an eye on them and consider wrapping them in foil after the first hour to retain moisture.
| Rib Type | Weight (per rack) | Nuwave Oven Time at 300°F | Internal Temp Target |
|---|---|---|---|
| Baby Back Ribs | 2-3 lbs | 2.5 – 3 hours | 195°F – 205°F |
| Spare Ribs | 4-5 lbs | 3.5 – 4 hours | 195°F – 205°F |
| St. Louis Spare Ribs | 3-4 lbs | 3 – 3.5 hours | 195°F – 205°F |
| Pork Loin Back Ribs | 1.5-2 lbs | 2 – 2.5 hours | 195°F – 203°F |
Step-by-Step Guide to Cooking Ribs in a Nuwave Oven
Now that you know the timing, let us walk through the actual process. Follow these steps for consistently delicious Nuwave oven ribs every single time.
Step 1: Prep Your Ribs
Start by removing the membrane from the back of the ribs. Use a butter knife to loosen one corner, then grip it with a paper towel and peel it off. This step is crucial because the membrane blocks seasoning from penetrating the meat and prevents even cooking.
Next, pat the ribs dry with paper towels. Dry meat absorbs rubs better and develops a better bark. Apply your favorite rib dry rub generously on all sides. Let the seasoned ribs sit at room temperature for about 30 minutes before cooking.
Step 2: Preheat Your Nuwave Oven
Always preheat your Nuwave oven to 300°F before placing the ribs inside. Preheating ensures the oven reaches the target temperature so your ribs start cooking immediately and evenly. Most Nuwave ovens preheat in about 5 to 10 minutes.
Place the oven rack in the middle position. This allows hot air to circulate around the ribs properly. You can also use the Nuwave oven’s rack holder or a baking pan with a wire rack to keep the ribs elevated.
Step 3: Cook Uncovered for the First 2 Hours
Place the ribs on the rack with the meat side facing up. Put them in the preheated Nuwave oven and cook uncovered for the first 2 hours. This allows the surface to dry out slightly, which helps form a nice crust or bark.
After the first hour, you can start basting the ribs if you like. Use your favorite barbecue sauce or a simple mix of apple cider vinegar and apple juice. Basting every 45 minutes adds flavor and keeps the surface moist.
Step 4: Wrap in Foil for the Final Hour
After about 2 hours, check the internal temperature. If the ribs are not yet at 195°F, wrap them tightly in heavy-duty aluminum foil. This technique, often called the “Texas crutch,” traps steam and speeds up the tenderizing process.
Add a splash of liquid inside the foil before sealing. Apple juice, apple cider vinegar, or even broth all work well. The steam created inside the foil braises the meat and makes it incredibly tender.
Return the wrapped ribs to the Nuwave oven and continue cooking for another 45 minutes to 1 hour. The total cooking time will now be around 3 to 3.5 hours for most rib types.
Step 5: Unwrap and Sauce
Remove the foil carefully — watch out for the steam. Brush a thin layer of barbecue sauce on the ribs and return them to the oven uncovered for the final 15 to 20 minutes. This lets the sauce caramelize without burning.
Check the internal temperature one more time. Once you hit 195°F to 205°F, your ribs are ready. Pull them out and let them rest before serving.
Temperature and Timing Guide for Perfect Ribs
Getting the temperature right is the single most important factor in how long to cook ribs in Nuwave oven settings. Let us break down the key temperature milestones.
The Low and Slow Approach
Cooking ribs at 300°F is the sweet spot for a Nuwave oven. This temperature is low enough to break down collagen slowly but high enough to cook the meat in a reasonable timeframe. Some pitmasters prefer 275°F for even slower cooking, but 300°F offers a great balance of speed and flavor.
Here is why 300°F works so well:
- Collagen breaks down efficiently at this temperature range.
- Fat renders slowly, basting the meat from the inside.
- The meat stays moist without drying out on the edges.
- Sugar in rubs and sauces caramelizes without burning.
Internal Temperature Targets
A meat thermometer is your best friend when cooking ribs. You cannot judge doneness by time alone because every rack of ribs is slightly different. Here are the temperature benchmarks to watch for:
- 160°F to 170°F — The ribs are cooked through but still tough. The collagen has not fully broken down yet.
- 180°F to 190°F — The ribs are starting to tenderize. You will notice some give when you press the meat.
- 195°F to 205°F — This is the target zone. The collagen has fully converted to gelatin, making the ribs tender and juicy.
- Above 210°F — The ribs may start to dry out and the meat could shrink away from the bone.
Always insert the thermometer into the thickest part of the meat, avoiding the bone. The bone conducts heat differently and can give you a false reading.
The Bend Test
In addition to using a thermometer, you can perform the bend test. Pick up the rack of ribs from one end with tongs. If the ribs bend and crack slightly on the surface, they are done. If they still feel stiff, they need more time. This is a classic pitmaster technique that works beautifully with Nuwave oven ribs.
Tips for Perfectly Tender and Flavorful Ribs
Even with perfect timing and temperature, small details can make a big difference. Here are some expert tips to elevate your Nuwave oven ribs from good to outstanding.
Choose the Right Ribs
Not all ribs are created equal. Look for ribs with good marbling and a pinkish color. Avoid ribs that look gray or dry. Fresh ribs from a local butcher often outperform what you find at the grocery store.
If you can only find frozen ribs, thaw them completely in the refrigerator overnight before cooking. Cooking frozen or partially frozen ribs leads to uneven results and longer cook times.
Season Generously
Do not be shy with your rub. Ribs are thick cuts of meat that need bold flavor. A good rub should have a balance of sweet, salty, smoky, and spicy elements.
Apply the rub at least 30 minutes before cooking, or even better, the night before. Letting the rub sit on the meat overnight allows the flavors to penetrate deeper into the meat fibers.
Do Not Skip the Rest
Once your ribs come out of the Nuwave oven, resist the urge to cut into them right away. Let them rest for 15 to 20 minutes under a loose tent of foil. During this time, the juices redistribute throughout the meat, making each bite more flavorful and moist.
Resting also gives the internal temperature time to equalize, so you get consistent doneness from end to end.
Experiment with Wood Chips
While the Nuwave oven does not have a built-in smoker box, you can still add a hint of smoke flavor. Soak wood chips in water for 30 minutes, then wrap them in aluminum foil with a few holes poked in the top. Place the foil packet on the bottom rack and let the smoke infuse the ribs as they cook.
Hickory and applewood chips are popular choices for ribs. Hickory gives a stronger, more traditional smoke flavor, while applewood offers a sweeter, milder taste.
Common Mistakes and How to Fix Them
Even experienced cooks make mistakes when learning how long to cook ribs in Nuwave oven settings. Here are the most common pitfalls and how to avoid them.
Cooking at Too High a Temperature
One of the biggest mistakes is cranking the heat to speed things up. Cooking ribs at 375°F or higher in a Nuwave oven will dry them out. The outside will burn before the inside has time to become tender. Stick to 300°F and be patient. Good ribs take time.
Not Using a Meat Thermometer
Relying solely on the clock is a recipe for inconsistency. Every rack of ribs is different in thickness and fat content. A meat thermometer takes the guesswork out and ensures perfect results every time. Invest in a good instant-read thermometer if you do not already have one.
Over-Saucing Too Early
Barbecue sauce contains sugar, which burns easily at high temperatures. If you apply sauce too early in the cooking process, it will caramelize into a bitter, blackened mess. Wait until the last 15 to 20 minutes of cooking to add your sauce, and apply it in thin layers.
Skipping the Foil Wrap
Some people skip the foil wrap entirely, which is fine if you have more time. But for most home cooks, the foil wrap saves time and ensures tenderness. Without it, ribs can take longer to reach the target internal temperature and may end up slightly drier.
Opening the Oven Too Often
Every time you open the Nuwave oven door, you lose heat and extend the cook time. Try to resist the urge to check on the ribs too frequently. Trust the process and only open the oven when it is time to baste or check the temperature.
Frequently Asked Questions
Can I cook ribs in a Nuwave oven without foil?
Yes, you absolutely can. Cooking ribs uncovered the entire time produces a thicker, crunchier bark on the outside. The tradeoff is that they may take slightly longer to become tender, usually around 3.5 to 4 hours for baby backs. Just make sure you keep the temperature steady at 300°F and baste regularly to keep the meat moist.
What is the best temperature to cook ribs in a Nuwave oven?
The best temperature is 300°F. This low and slow setting allows the collagen in the ribs to break down properly, resulting in tender, juicy meat. Some cooks prefer 275°F for even more tenderness, but 300°F is the sweet spot for most home cooks using a Nuwave oven.
How do I know when ribs are done in a Nuwave oven?
The most reliable way is to use a meat thermometer. Ribs are done when they reach an internal temperature of 195°F to 205°F. You can also perform the bend test — if the ribs bend and crack slightly when you lift them from one end with tongs, they are ready to come out.
Can I use frozen ribs in a Nuwave oven?
It is best to thaw your ribs completely before cooking. Frozen ribs will cook unevenly and take significantly longer. If you must cook from frozen, add at least an extra hour to the cooking time and make sure the internal temperature reaches the 195°F to 205°F range before serving.
Do I need to flip the ribs while cooking in a Nuwave oven?
No, you do not need to flip the ribs. The Nuwave oven’s convection technology circulates hot air evenly around the meat, so both sides cook uniformly. Just make sure the ribs are placed meat-side up on the rack for the best results.
Can I use barbecue sauce during the entire cook time?
No, applying sauce for the full cook time will cause it to burn and turn bitter because of the sugar content. Add sauce only during the last 15 to 20 minutes of cooking, and apply it in thin layers. This gives you a nice glazed finish without the risk of scorching.
Conclusion
How long to cook ribs in a Nuwave oven comes down to the type of ribs you are using and the temperature you set. Baby back ribs shine in about 2.5 to 3 hours, while spare ribs need 3.5 to 4 hours at 300°F. The key is patience, a reliable meat thermometer, and a little bit of love.
The Nuwave oven makes it incredibly easy to achieve tender, flavorful ribs without the hassle of a full-sized smoker or grill. With the steps and tips in this guide, you are fully equipped to cook ribs that rival your favorite barbecue restaurant.
Start with the basics, follow the timing and temperature guidelines, and then experiment with your own flavors and techniques. Once you master cooking ribs in a Nuwave oven, you will never go back to overcooked, dry ribs again. Fire up your oven, grab your favorite rack of ribs, and enjoy the process. Your taste buds will thank you.