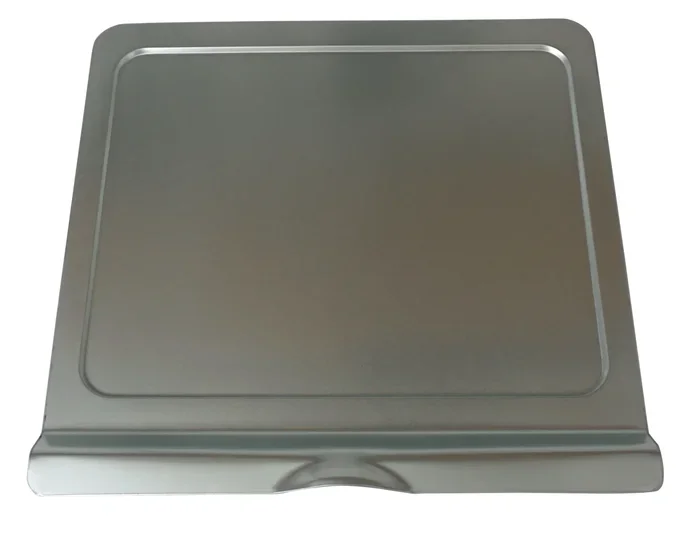
How To Clean Toaster Oven Crumb Tray The Right Way
Cleaning your toaster oven crumb tray doesn’t have to be a chore. This guide walks you through every step to remove grease, burnt crumbs, and food residue safely and effectively. You’ll learn the best cleaning methods, what supplies to use, and how to keep your oven running like new.
Every time you use your toaster oven, tiny bread crumbs, food bits, and grease drop to the bottom. Over time, this buildup creates smoke, unpleasant odors, and even fire risks. The toaster oven crumb tray catches all of that mess, but it needs regular attention to do its job properly.
If you have noticed smoke coming from your oven or smelled something burning during cooking, your crumb tray is probably screaming for help. Cleaning a toaster oven crumb tray is simple, fast, and requires almost no special tools. In this guide, we will walk you through the entire process step by step so your oven stays fresh, safe, and working at its best.
Whether you are a kitchen beginner or a seasoned cook, this article gives you everything you need to know. We cover why cleaning matters, what supplies to grab, the best cleaning methods, and common mistakes to avoid. By the end, you will feel confident tackling that greasy tray like a pro.
Key Takeaways
- Regular cleaning prevents grease buildup: Clean your crumb tray every 1-2 weeks to avoid smoke and odors.
- Soaking is the secret weapon: Warm soapy water loosens even stubborn burnt-on crumbs.
- Baking soda and vinegar work wonders: These household items are safe, affordable, and highly effective.
- Never use metal scrubbers on non-stick trays: They can scratch and damage the surface permanently.
- Dishwasher-safe trays save time: Check your manual before tossing the tray in the dishwasher.
- Dry the tray completely before reinserting: Moisture can cause rust and affect oven performance.
- Prevention is easier than cleaning: Using foil liners and shaking out crumbs regularly reduces buildup significantly.
📑 Table of Contents
Why Cleaning Your Toaster Oven Crumb Tray Matters
Most people forget about the crumb tray until something goes wrong. But keeping it clean is one of the simplest ways to maintain your kitchen appliance and ensure safe cooking. Let us look at why this small part deserves your attention.
The Hidden Dangers of Grease Buildup
When crumbs and grease sit in the tray for too long, they start to smoke at high temperatures. This smoke carries a burnt smell throughout your kitchen and can even set off your smoke detector. In worst cases, accumulated grease near the heating element becomes a fire hazard.
Beyond safety, dirty trays affect cooking performance. Built-up grease can block airflow inside the oven, leading to uneven cooking. Your food may take longer to cook or come out less crispy than it should. A clean tray allows hot air to circulate freely, which means better results every time you bake or toast.
How Often Should You Clean It?
You should clean your removable crumb tray every one to two weeks if you use your toaster oven frequently. If you cook a lot of greasy or crumbly foods like pizza, pastries, or bread, you may need to clean it more often.
A good rule of thumb is to check the tray after every few uses. If you see a visible layer of crumbs or grease, it is time for a cleaning session. Catching buildup early makes the whole process much easier and faster.
What You Need to Clean a Toaster Oven Crumb Tray
Before you start, gather your supplies. The good news is that you probably already have everything you need in your kitchen. No expensive products required.
Household Cleaning Supplies
- Warm water – the foundation of most cleaning methods
- Dish soap – cuts through grease effectively
- Baking soda – a natural abrasive that lifts stubborn stains
- White vinegar – dissolves grease and deodorizes naturally
- Soft sponge or cloth – for gentle scrubbing without scratching
- Old toothbrush – perfect for reaching corners and crevices
Specialty Tools (Optional)
While not necessary, a few extra tools can make the job even easier. A silicone scrub brush works well on tough spots without damaging surfaces. Some people also keep a dedicated non-abrasive scrubbing pad just for kitchen appliances. If your tray is dishwasher-safe, running it through a normal cycle is the easiest option of all.
Always avoid steel wool, metal scrubbers, or harsh chemical cleaners. These can scratch or damage the tray surface, especially if it has a non-stick coating. Stick to gentle, food-safe cleaning methods whenever possible.
Step-by-Step Guide to Cleaning Your Crumb Tray
Now let us get into the actual process. Follow these steps for a thorough and safe cleaning every time.
Step One: Removing the Crumb Tray Safely
Unplug your toaster oven first. This is the most important safety step and one that many people skip. Wait for the oven to cool completely before touching any parts. Most trays slide out from the bottom or front of the oven with a gentle pull. Check your owner manual if you are unsure where yours is located.
Place the tray over a trash can or sink and shake out loose crumbs. This pre-cleaning step makes the rest of the process much faster and less messy. A soft brush or dry cloth works well for this initial sweep.
Step Two: Soaking the Tray
Fill your sink or a basin with warm water and add a few drops of dish soap. Submerge the tray and let it soak for 15 to 30 minutes. Soaking softens baked-on grease and loosens stubborn food particles, making scrubbing much easier.
For really tough grime, add two tablespoons of baking soda to the soapy water. The mild abrasion helps break down grease without scratching the surface. If you prefer a natural approach, a splash of white vinegar added to the soaking water creates a fizzy reaction that lifts grime effectively.
Step Three: Scrubbing and Rinsing
After soaking, use a soft sponge to scrub the tray gently. Focus on areas with heavy grease or burnt residue. An old toothbrush works great for corners and edges where crumbs tend to hide. For stubborn spots, make a paste of baking soda and water, apply it directly, and let it sit for five minutes before scrubbing again.
Rinse the tray thoroughly under clean running water. Make sure to remove all soap residue. Inspect the tray closely and repeat the scrubbing step if needed. A clean tray should feel smooth and look free of any grease film or discoloration.
Step Four: Drying and Reinserting
Dry the tray completely with a clean towel before putting it back. Even small amounts of moisture can cause rust on metal trays or affect the non-stick coating over time. Letting it air-dry for a few extra minutes is a good idea if you want to be thorough.
Once dry, slide the tray back into its slot carefully. Do not force it if it does not fit easily. Check that it sits flat and level inside the oven. A properly seated tray collects crumbs and grease effectively, keeping your oven clean between cleaning sessions.
Cleaning Methods Compared
Not all cleaning methods work the same for every situation. Here is a quick comparison of the most popular approaches to toaster oven crumb tray cleaning.
| Method | Best For | Effort Level | Time Needed |
|---|---|---|---|
| Warm Soapy Water Soak | Light to moderate grease and crumbs | Easy | 30 minutes |
| Baking Soda Paste | Stubborn burnt-on residue | Medium | 45 minutes |
| Vinegar and Baking Soda | Heavy grease and odors | Medium | 30 minutes |
| Dishwasher Cycle | Dishwasher-safe trays with light buildup | Very Easy | 1-2 hours |
| Commercial Oven Cleaner | Extremely heavy grease buildup | Hard | 1-2 hours |
For most households, the warm soapy water soak combined with a baking soda paste handles 90 percent of cleaning needs. Reserve commercial cleaners for extreme cases and always follow the product instructions carefully. Never use oven cleaner inside the toaster oven itself, as chemical residues can contaminate food.
Common Mistakes to Avoid
Even with the best intentions, people make mistakes when cleaning their crumb trays. Here are the most common ones and how to avoid them.
- Using abrasive scrubbers: Steel wool and harsh pads scratch non-stick surfaces, making them harder to clean over time and potentially damaging the coating.
- Putting a hot tray in cold water: Sudden temperature changes can warp metal trays. Always let the tray cool before washing.
- Reinserting a wet tray: Moisture trapped inside the oven can cause rust and affect heating elements. Always dry completely.
- Using too much vinegar: While vinegar is excellent for cleaning, excessive amounts can leave a lingering smell. A splash is enough.
- Ignoring the tray until it smells: By the time you notice an odor, grease buildup is already significant. Clean regularly to avoid this.
- Forcing a stuck tray: If the tray does not slide out easily, do not use excessive force. Check for debris blocking the tracks and gently work it free.
Expert Tips for Keeping Your Crumb Tray Clean Longer
Cleaning is only half the battle. Prevention plays a huge role in keeping your toaster oven hygiene at a high level. Here are some expert-backed tips that make a real difference.
Use a foil liner: Placing a sheet of aluminum foil or a silicone liner on the oven floor catches most crumbs before they reach the tray. Just remember to remove and replace the liner after each use. Never let foil touch the heating elements, as this creates a fire risk.
Shake out crumbs after every few uses: Take the tray out, hold it over the trash, and give it a quick shake. This takes less than ten seconds but dramatically reduces buildup between full cleaning sessions.
Line the oven with parchment paper: Similar to foil liners, parchment paper catches crumbs effectively. Cut it to fit the bottom of the oven and replace it frequently. This simple habit keeps your tray much cleaner for longer.
Avoid overloading the oven: When you pack too much food in, more crumbs and grease drip down. Give your food some space so excess debris falls directly onto the tray rather than spreading around the oven cavity.
Wipe down the interior monthly: Even with a clean tray, grease can splatter on the oven walls and ceiling. A quick wipe with a damp cloth and mild soap once a month keeps the entire interior fresh.
Replace worn-out trays when needed: Over time, trays can become warped, rusted, or coated with residue that will not come off. Most replacement trays are inexpensive and easy to find. Check your manufacturer website or a local appliance store for the right fit.
Run a self-clean cycle if available: Some modern toaster ovens include a self-cleaning or steam-cleaning feature. These settings use high heat or steam to loosen grease and crumbs automatically. While they do not replace manual tray cleaning, they help maintain overall oven cleanliness between deep cleans.
Frequently Asked Questions
Can I put my toaster oven crumb tray in the dishwasher?
Many toaster oven trays are dishwasher-safe, but not all of them. Check your owner manual or look for a dishwasher-safe symbol on the tray before placing it in the machine. Hand washing with warm soapy water is always a safe option that extends the life of the tray.
What is the best way to remove burnt-on crumbs from the tray?
The most effective method is to make a thick paste of baking soda and water, apply it to the burnt spots, and let it sit for 15 to 20 minutes. Then scrub gently with a soft sponge or old toothbrush. For really stubborn spots, add a splash of white vinegar to the paste for extra cleaning power.
How do I get grease stains out of my crumb tray?
Soak the tray in warm soapy water for 20 minutes, then scrub with a baking soda paste. For heavy grease, mix equal parts baking soda and water to create a strong cleaning paste. Apply it, let it sit for 10 minutes, and scrub in circular motions with a soft sponge.
Is it safe to use oven cleaner on a toaster oven crumb tray?
It is not recommended. Chemical oven cleaners can leave residues that contaminate food the next time you use the oven. Stick to natural cleaners like baking soda, vinegar, and dish soap. They are safer, more affordable, and work very well for this application.
Why does my toaster oven smoke even with a clean crumb tray?
Smoke can come from grease splattered on the oven walls or ceiling, not just the tray. Food residue on the heating elements can also cause smoking. Try wiping down the interior with a damp cloth and checking the elements for any stuck-on food particles.
Can I clean the crumb tray while it is still in the oven?
You can wipe it out with a damp cloth while it is inside, but removing the tray gives you much better access for a thorough cleaning. Always unplug the oven and let it cool completely before attempting any cleaning, whether the tray is removed or not.
Conclusion
Cleaning your toaster oven crumb tray the right way is one of the simplest yet most impactful kitchen maintenance tasks you can do. It takes just minutes, requires almost no special supplies, and keeps your oven safe, fresh, and performing at its best. Regular cleaning prevents grease buildup, reduces smoke and odors, and extends the life of your appliance.
Remember to clean your tray every one to two weeks, use gentle cleaning methods, and dry the tray completely before reinserting it. Avoid common mistakes like using abrasive scrubbers or putting a hot tray in cold water. With the tips and methods shared in this guide, you have everything you need to keep that toaster oven tray spotless.
Start today. Pull out your crumb tray, give it a proper cleaning, and notice the difference in your next cooking session. A little maintenance goes a long way, and your toaster oven will thank you with better performance and safer operation every single time you use it.