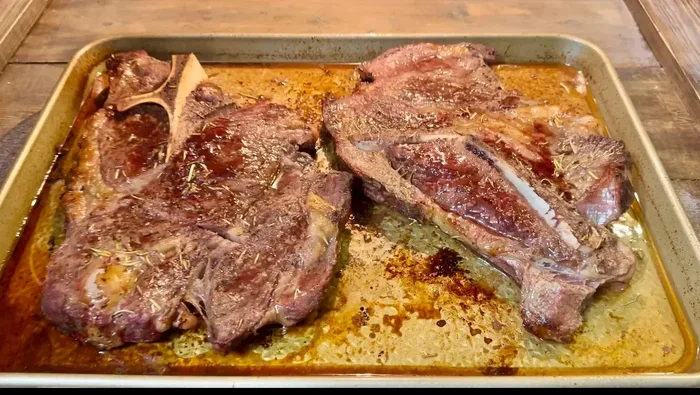
How Long To Cook Chuck Steak In Oven At 350 Degrees
Cooking chuck steak in the oven at 350 degrees takes about 1.5 to 3 hours depending on the cut size and desired tenderness. This guide covers exact cook times, internal temperatures, and pro tips so you get a fork-tender, flavorful chuck steak every single time. Whether you are braising a whole roast or cooking individual steaks, you will find everything you need right here.
There is something deeply satisfying about a perfectly cooked chuck steak straight from the oven. The kind that falls apart with a gentle touch of a fork. The kind that fills your kitchen with the warm, rich aroma of slow-cooked beef.
If you have ever wondered how long to cook chuck steak in oven at 350, you are in the right place. This article breaks down everything you need to know. From timing and temperature to seasoning and searing. We will walk you through each step so your next chuck steak comes out exactly the way you want it.
Beef chuck is one of the most versatile and affordable cuts available. It comes from the shoulder area of the cow, which means it has plenty of connective tissue and intramuscular fat. When cooked correctly, all that collagen breaks down into gelatin. The result is meat that is incredibly tender and full of beefy flavor. But cook it wrong, and you end up with something tough and chewy. That is why timing and temperature matter so much.
Cooking chuck steak in the oven at 350°F is one of the best methods you can use. It provides steady, even heat that works beautifully for braising and slow-roasting. You do not need any fancy equipment. Just a good oven, a baking dish or Dutch oven, and a little patience. Let us dive into the details.
Key Takeaways
- Cook Time: Chuck steak at 350°F typically needs 1.5 to 3 hours based on thickness and cut.
- Internal Temperature: Aim for 200-205°F for tender, pull-apart texture in braised dishes.
- Searing Matters: Always sear your steak first for deeper flavor and better texture.
- Liquid Ratio: Use about 1 to 2 cups of braising liquid for optimal moisture.
- Resting Is Key: Let the steak rest for 10 minutes before slicing to retain juices.
- Size Matters: Thicker cuts need more time; thin slices cook faster and can dry out.
- Seasoning Basics: Simple salt, pepper, garlic, and herbs go a long way with beef chuck.
📑 Table of Contents
- Understanding Chuck Steak and Why 350°F Works
- How Long To Cook Chuck Steak In Oven At 350 Degrees
- Step-by-Step Guide to Cooking Chuck Steak at 350°F
- Tips for the Perfect Braised Chuck Steak
- Common Mistakes to Avoid When Cooking Chuck Steak
- Serving Suggestions and Pairing Ideas
- How to Store and Reheat Leftover Braised Chuck Steak
- Frequently Asked Questions
Understanding Chuck Steak and Why 350°F Works
Before we get into specific times, it helps to understand what you are working with. Chuck steak comes from the shoulder primal cut. This area gets a lot of exercise from the animal, which means the muscle fibers are dense and surrounded by tough connective tissue. That is exactly why low and slow cooking works so well for this cut.
When you cook beef at 350°F, the heat penetrates gradually. The collagen in the meat starts to break down at around 160°F and continues transforming all the way up to 205°F. This process is called collagen conversion. It is what turns a tough cut into a tender masterpiece. At 350°F, you get a good balance between cooking speed and tenderness development.
What Makes Chuck Steak Different From Other Cuts
Not all beef steaks are created equal. A ribeye or filet mignon is tender enough to cook quickly at high heat. Chuck steak needs a different approach. Here is why:
- Higher collagen content: This makes chuck ideal for braising and slow cooking.
- More marbling: The fat within the muscle adds flavor and moisture during long cooks.
- Denser muscle fibers: They need more time to become tender compared to leaner cuts.
- Affordability: Chuck is one of the most budget-friendly beef cuts available.
- Versatility: It works great for stews, pot roasts, and individual steaks alike.
Understanding these characteristics helps you appreciate why the cook time at 350°F is what it is. You are not just heating meat. You are transforming its entire texture and structure.
How Long To Cook Chuck Steak In Oven At 350 Degrees
This is the section you have been waiting for. The actual cook time depends on several factors. The thickness of the steak, whether it is a whole roast or individual pieces, and what level of tenderness you prefer all play a role.
Cook Times by Steak Thickness
Here is a general breakdown of chuck steak cook times at 350°F:
- Thin slices (under 1 inch): 45 minutes to 1 hour. These cook quickly and can dry out if you go too long.
- Standard steaks (1 to 1.5 inches): 1.5 to 2 hours. This is the sweet spot for most home cooks.
- Thick cuts (1.5 to 2 inches): 2 to 2.5 hours. Give them extra time for the heat to penetrate fully.
- Whole chuck roast (3 to 4 pounds): 2.5 to 3 hours. This is ideal for pot roast-style dishes.
These times assume you are braising the steak with some liquid. If you are dry-roasting a thinner steak, the time will be shorter. But braising is the recommended method for chuck because it keeps the meat moist throughout the entire cook.
The Role of Internal Temperature
Time is important, but internal temperature is what really tells you when your steak is done. Use a reliable meat thermometer. Here are the key temperature benchmarks:
- 145°F: Medium-rare. This is the safe minimum for whole cuts of beef, but chuck steak will still be tough at this point.
- 160°F: Medium. Better texture than rare, but still not fully tender for chuck.
- 180°F: Good braising temperature. The collagen has started breaking down.
- 200-205°F: The sweet spot. The meat should be fork-tender and falling apart nicely.
For the best results with oven-braised chuck steak at 350, pull it out when it reaches 200-205°F internally. The meat will continue to cook slightly as it rests.
Step-by-Step Guide to Cooking Chuck Steak at 350°F
Now that you know the timing, let us walk through the actual process. Following these steps will give you consistently great results.
Step 1: Prep and Season Your Steak
Start by removing your chuck steak from the refrigerator about 30 minutes before cooking. Letting it come to room temperature helps it cook more evenly. Pat it dry with paper towels. Then season generously with salt and pepper on both sides.
You can keep it simple with just salt and pepper. Or you can add garlic powder, smoked paprika, onion powder, and dried herbs like thyme or rosemary. A simple chuck steak seasoning blend works wonders. The key is to season the meat well before it goes into the oven.
Step 2: Sear the Steak
Searing is not optional. It is essential. Heat a tablespoon of oil in a heavy oven-safe skillet or Dutch oven over medium-high heat. Once the oil is shimmering, place the steak in the pan. Let it sear for about 3 to 4 minutes per side until you get a deep brown crust.
The Maillard reaction that happens during searing creates hundreds of new flavor compounds. This is what gives your braised steak that rich, complex taste you cannot get from just throwing it in the oven raw. Sear all sides, including the edges if your steak is thick.
Step 3: Add Aromatics and Liquid
After searing, remove the steak and set it aside. In the same pan, add chopped onions, carrots, and celery. Sauté for about 5 minutes until they start to soften. Add minced garlic and cook for another minute until fragrant.
Pour in your braising liquid. This can be beef broth, red wine, or a combination of both. Add about 1 to 2 cups of liquid total. You want enough to come about halfway up the steak, not cover it completely. Drop in a few sprigs of fresh thyme or rosemary if you have them.
Step 4: Braise in the Oven
Place the seared steak back into the pan. Cover it tightly with a lid or aluminum foil. Transfer the entire pan to a preheated oven set to 350°F. Now you wait.
Set a timer based on the thickness guidelines above. Resist the urge to open the lid too often. Every time you lift the cover, you lose heat and moisture. Trust the process and let the oven do the work.
Step 5: Check Doneness and Rest
After the estimated cook time, insert a meat thermometer into the thickest part of the steak. Check the internal temperature against the benchmarks listed above. If it has not reached 200°F yet, keep braising and check every 15 minutes.
Once the steak is done, remove it from the oven. Let it rest for at least 10 minutes before slicing. This resting period allows the juices to redistribute throughout the meat. If you cut too soon, all those juices will run out onto the cutting board instead of staying in the steak.
Tips for the Perfect Braised Chuck Steak
Getting great results is about more than just timing. Here are some practical tips that make a real difference.
Use the Right Pan
A Dutch oven is the gold standard for braising. It distributes heat evenly and the heavy lid traps moisture. If you do not have a Dutch oven, a deep baking dish covered with foil works fine too. Just make sure whatever you use is oven-safe to at least 350°F.
Do Not Skip the Searing Step
We mentioned this already, but it deserves repeating. Searing adds a layer of flavor that braising alone cannot provide. Take the extra 10 minutes to do it properly. Your taste buds will thank you.
Choose the Right Liquid
Beef broth is a safe and reliable choice. Red wine adds depth and acidity. A mix of both creates a complex braising liquid. You can also add tomato paste, Worcestershire sauce, or soy sauce for extra umami. Avoid using plain water, as it dilutes flavor.
Add Vegetables for a Complete Meal
One of the best things about braised chuck steak is that you can cook vegetables right in the same pan. Potatoes, carrots, parsnips, and onions all work beautifully. Add them about 45 minutes before the steak is done so they do not turn to mush.
Let the Steak Rest Properly
Resting is not just a suggestion. It is a critical step. During cooking, the juices get pushed toward the center of the steak. Resting allows those juices to spread back out evenly. Tent the steak loosely with foil and give it 10 to 15 minutes before you cut into it.
Common Mistakes to Avoid When Cooking Chuck Steak
Even experienced cooks sometimes make mistakes with braised chuck steak. Here are the most common ones and how to avoid them.
Cooking at Too High a Temperature
Some people think cranking the oven up to 400°F or 425°F will speed things up. It does not work that way with chuck steak. High heat causes the muscle fibers to contract tightly, squeezing out moisture. The result is dry, tough meat. Stick with 350°F for the best tenderness.
Not Using Enough Liquid
Braising requires enough liquid to create steam inside the covered pan. If you use too little, the meat will dry out instead of becoming tender. Make sure the liquid comes at least halfway up the steak.
Cutting Too Soon
We cannot stress this enough. Cutting into your steak immediately after removing it from the oven releases all those hard-earned juices. Be patient. Wait at least 10 minutes. The meat will be juicier and more flavorful for it.
Using the Wrong Cut of Meat
Not all chuck steaks are the same. Look for cuts with good marbling and a reasonable thickness. Paper-thin chuck steaks will overcook before the collagen has time to break down. Choose pieces that are at least 1 inch thick for best results.
Skipping the Sear
It might feel like an unnecessary extra step, but searing builds the foundation of flavor for your entire dish. Skipping it leaves you with a flat, one-dimensional taste. Take the time to get a good brown crust on all sides.
Serving Suggestions and Pairing Ideas
Now that your chuck steak is perfectly cooked, it is time to think about serving. Braised chuck steak pairs wonderfully with many sides and accompaniments.
- Mashed potatoes: The classic pairing. Creamy potatoes soak up the rich braising juices beautifully.
- Crusty bread: Use it to mop up every last drop of sauce from the pan.
- Rice or egg noodles: These absorb the beefy braising liquid wonderfully.
- Roasted vegetables: Carrots, parsnips, and Brussels sprouts complement the rich beef flavor.
- Polenta: Creamy polenta makes a luxurious base for braised steak.
- Simple green salad: A fresh salad with a bright vinaigrette cuts through the richness of the meat.
For the braising liquid itself, you can strain it and serve it as a pan sauce. Simply simmer it on the stovetop until it reduces and thickens slightly. Add a knob of butter at the end for extra richness and shine. Pour it over the sliced steak and enjoy.
How to Store and Reheat Leftover Braised Chuck Steak
Braised chuck steak tastes even better the next day. The flavors have time to meld and deepen overnight. Here is how to handle leftovers properly.
Let the steak cool to room temperature before storing. Place it in an airtight container and refrigerate within 2 hours. Properly stored, braised chuck steak keeps in the fridge for up to 3 to 4 days.
To reheat, place the steak and some braising liquid in a covered baking dish. Warm it in the oven at 300°F for about 20 to 30 minutes. This gentle reheating method keeps the meat moist and tender. Avoid microwaving if you can, as it tends to dry out the edges.
You can also freeze braised chuck steak for up to 3 months. Wrap it tightly in plastic wrap and then aluminum foil, or place it in a freezer-safe bag with the braising liquid. Thaw overnight in the refrigerator before reheating.
Frequently Asked Questions
Can you cook chuck steak in the oven at 350 without braising liquid?
You can, but the results will not be the same. Without liquid, the steak will roast dry rather than braise. Chuck steak has a lot of connective tissue that needs moisture and low heat to break down. Dry roasting at 350°F can work for thinner slices cooked for a shorter time, but you risk ending up with tough meat. Braising is the recommended method for the best tenderness.
How do you know when chuck steak is done in the oven?
The best way to check is with a meat thermometer. Insert it into the thickest part of the steak. For braised chuck steak, aim for an internal temperature of 200-205°F. At this point, the collagen has fully broken down and the meat should be fork-tender. You can also test it by pressing the meat with a fork. If it shreds easily, it is done.
Can you cook frozen chuck steak in the oven at 350?
It is not recommended. Cooking frozen steak leads to uneven cooking. The outside can overcook while the inside is still thawing. Always thaw your chuck steak in the refrigerator overnight before cooking. This ensures even heat distribution and better results throughout the entire piece of meat.
What is the difference between braising and roasting chuck steak?
Braising involves cooking the steak partially submerged in liquid, covered, at a lower temperature for a longer time. Roasting means cooking the steak dry, without liquid, in an open pan. For chuck steak, braising at 350°F produces far superior results because the liquid and steam keep the meat moist while the collagen breaks down down slowly.
How long does it take to cook a 2-pound chuck roast at 350°F?
A 2-pound chuck roast at 350°F typically takes about 2 to 2.5 hours when braised. This assumes you are searing it first and using enough liquid to come about halfway up the roast. Check the internal temperature and aim for 200-205°F for the most tender result.
Does chuck steak get more tender the longer you cook it?
Yes, up to a point. The collagen in chuck steak breaks down over time with low, steady heat. This is what makes the meat tender. However, there is a limit. Cooking too long can cause the muscle fibers to become mushy and lose their structure. For most chuck steaks at 350°F, 2 to 3 hours is the sweet spot. Going beyond that can start to break the meat down too much.


