How To Make Crispy Homemade Tater Tots In The Oven
Learn how to make crispy homemade tater tots in the oven with this simple recipe. These baked potato bites are golden, crunchy, and far healthier than fried versions. You will love how easy they are to prepare and customize with your favorite seasonings.
There is something magical about homemade tater tots. They are golden, crunchy on the outside, and soft on the inside. You can eat them as a side dish, a snack, or even a main event. Best of all, you do not need a deep fryer to get them right.
Making homemade tater tots in the oven is surprisingly simple. You just need a few ingredients and a little patience. This guide will walk you through every step. You will learn how to prep the potatoes, shape the tots, and bake them to crispy perfection. By the end, you will never go back to the freezer aisle again.
Key Takeaways
- Oven-baked tater tots are healthier: You skip the deep fryer and still get a crunchy exterior.
- Few simple ingredients: Potatoes, a little starch, oil, and seasoning are all you need.
- Perfect crispiness comes from technique: Parboiling, grating, and a hot oven make all the difference.
- Customizable flavors: Add herbs, cheese, or spice blends to make them your own.
- Freezer-friendly: Bake a big batch and freeze for quick snacks anytime.
- Works for any oven: Whether you have a conventional or convection oven, the method adapts easily.
📑 Table of Contents
Why Homemade Tater Tots Are Worth It
Store-bought frozen tots are convenient, but they often taste flat. They can be heavy with added salt and preservatives. When you make homemade tater tots, you control every ingredient. You choose the potatoes, the oil, and the seasonings. The result is a fresher, more flavorful snack.
The Joy of Oven-Baked Tater Tots
Oven-baking is a healthier way to cook homemade tater tots. You use a light mist of oil instead of a bath of hot grease. The oven circulates heat evenly, giving you a uniform crunch. Plus, cleanup is a breeze. A sheet pan and parchment paper do the job.
Many people think baking takes longer than frying. That is not true with the right method. A hot oven and a little prep time yield tots that rival any deep-fried version. They turn out crispy on the edges and fluffy in the center.
Store-Bought vs Homemade: A Quick Comparison
| Feature | Store-Bought Tots | Homemade Tater Tots |
|---|---|---|
| Ingredients | Preservatives, excess salt | Fresh potatoes, simple seasonings |
| Texture | Often soft or greasy | Crispy outside, fluffy inside |
| Customization | Limited flavors | Endless seasoning options |
| Cost | Higher per serving | Lower, especially with bulk potatoes |
| Health Factor | High sodium, additives | Controlled oil and salt |
As you can see, homemade tater tots win on almost every front. They taste better, feel lighter, and you know exactly what is in them.
Ingredients You Will Need for Perfect Tater Tots
Keeping the ingredient list short is key. You want the potato flavor to shine. Here is what you need for a batch of crispy homemade tater tots.
The Potato Base
Use starchy potatoes like Russets. They have less moisture and bind well. You will need about 2 pounds of potatoes for a generous batch. Yukon Gold works too, but Russets give the best texture.
- 2 pounds Russet potatoes, peeled
- 1 tablespoon cornstarch or potato starch
- 1 egg, lightly beaten
- 1/4 cup grated Parmesan cheese (optional)
Binding and Seasoning
The starch helps the mixture hold together. The egg acts as a glue. Without these, your oven tater tots will crumble. Seasoning is where you can get creative.
- 1 teaspoon salt
- 1/2 teaspoon black pepper
- 1 teaspoon garlic powder
- 1 teaspoon onion powder
- 1/2 teaspoon smoked paprika
- 1/4 teaspoon cayenne (optional for heat)
For the oil, you will need olive oil spray or a light brush of melted butter. A spray gives a thin, even coat. This is crucial for crispiness without excess grease.
Step-by-Step: How to Make Homemade Tater Tots
This is the heart of the process. Follow these steps and you will have perfect crispy baked tater tots every time. Each step builds on the last, so do not skip ahead.
Prep the Potatoes
Start by boiling the potatoes. Do not skip parboiling. It softens the potatoes so they blend smoothly. Peel the potatoes and cut them into chunks. Boil them in salted water for about 10 minutes. They should be fork-tender but not falling apart.
Drain the potatoes well. Let them steam off for a few minutes. Excess moisture is the enemy of crispy oven-baked tater tots. Too much water makes the mixture soggy. Spread them on a tray to cool slightly.
Grate and Mix
While the potatoes are warm, grate them. Use the large holes of a box grater or a food processor. You want a rustic texture, not a fine mash. Warm potatoes grate more easily and release less starch.
Place the grated potatoes in a clean kitchen towel. Gather the edges and twist over the sink. Squeeze out as much liquid as you can. This step is non-negotiable. Dry potatoes mean firm tots.
In a large bowl, combine the squeezed potatoes, cornstarch, egg, Parmesan, and all the seasonings. Mix gently with your hands. Do not overwork the mixture. You want it to hold together without becoming gluey.
Form the Tots
Take a small handful of the mixture, about a tablespoon. Roll it between your palms into a log shape, roughly 1.5 inches long. Place each tot on a parchment-lined baking sheet. Leave space between them so air circulates.
If the mixture feels too wet, add a little more cornstarch. If it crumbles, mix in a teaspoon of water. The dough should feel like Play-Doh. It should hold its shape when you roll it.
Once all the mixture is formed, you can freeze the raw tots now. This makes them ready for a quick bake later. Flash freeze them on the tray first, then transfer to a freezer bag. Homemade frozen tater tots are a game-changer for busy weeknights.
Bake to Crispy Perfection
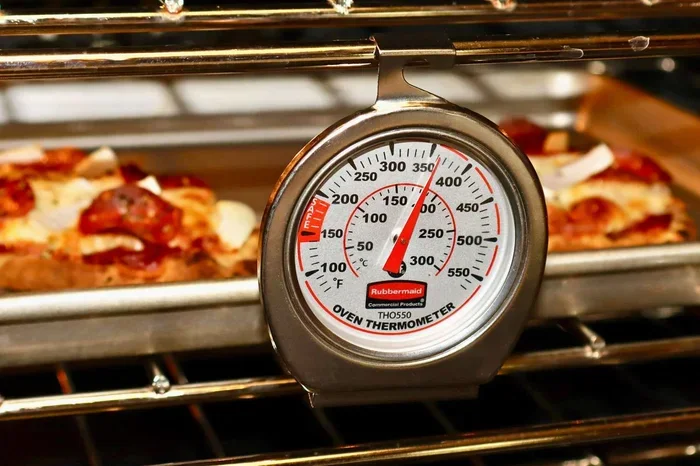
Preheat your oven to 425°F (220°C). Line a baking sheet with parchment paper. Arrange the tots in a single layer. Spray them lightly with olive oil spray or brush with a thin layer of oil.
Bake for 20 minutes. Do not open the oven door too early. Let the heat do its work. After 20 minutes, flip each tot carefully. Return them to the oven for another 15 to 20 minutes. They are done when the edges are deep golden brown and sound hollow when tapped.
Let them cool on the pan for 5 minutes. This helps the inside set. Transfer to a wire rack if you want them even crispier on all sides.
Oven Temperature and Time: The Golden Rules
Getting the temperature right is the secret to crispy oven tater tots. Too low and they turn out pale and soft. Too high and the outside burns before the inside cooks through. Here is a simple guide.
| Oven Temp | Bake Time | Result |
|---|---|---|
| 400°F (200°C) | 25-30 minutes | Softer, more potato-forward |
| 425°F (220°C) | 35-40 minutes | Classic crispy exterior |
| 450°F (230°C) | 20-25 minutes | Extra crunchy, watch closely |
For the best balance, stick with 425°F. This temperature browns the outside without drying out the inside. If you use a convection oven, reduce the temperature by 25°F. Convection fans circulate hot air, so they cook faster.
Always preheat your oven. A cold oven slows down the cooking and makes the tots greasy. A hot oven sears the outside immediately, locking in moisture.
Quick Tips for Maximum Crispiness
Even with a great recipe, small details can make or break your homemade tater tots. Use these tips to take them from good to restaurant-quality.
Common Mistakes to Avoid
- Skipping the squeeze: Wet potatoes lead to mushy tots. Always squeeze out the liquid.
- Overcrowding the pan: Tots need space for hot air to flow. Use two sheets if needed.
- Using cold potatoes: Warm potatoes mix better and form a firmer dough.
- Too much oil: A light spray is enough. Excess oil steams the tots instead of crisping them.
- Opening the oven too often: Every peek drops the temperature. Trust the timer.
Expert Insights
Professional chefs often use a trick called double-baking. After the first bake, let the tots cool completely. Then bake them again at 450°F for 10 minutes. This double cook creates an extra-crunchy shell. It is the same method used for oven fries and roasted potato wedges.
Another pro tip is to add a little potato starch to the mixture. It absorbs excess moisture and helps the tots hold their shape. Some cooks also mix in a tablespoon of sour cream for extra tenderness. The fat in the sour cream creates a flaky interior.
If you want a restaurant-style finish, roll the formed tots in panko breadcrumbs before baking. Panko gives a lighter, crunchier coating than regular flour. It adds a subtle nuttiness that pairs well with the potato.
Serving Ideas and Storage
Homemade tater tots are delicious on their own, but they shine even more with the right dip. Serve them with classic ketchup, creamy ranch, or a spicy chipotle mayo. For a fun twist, make a cheese sauce to pour over them.
These tots make a great side for burgers, sandwiches, or grilled chicken. They also work well as a base for a tot casserole. Layer them in a baking dish, cover with cheese and gravy, and bake until bubbly.
Dipping Sauces to Try
- Classic ketchup – always a crowd-pleaser
- Garlic aioli – mix mayo, minced garlic, and a squeeze of lemon
- Honey mustard – sweet and tangy
- Cool ranch – add a pinch of dried dill for extra flavor
- Barbecue sauce – smoky and sweet
Freezing and Reheating
You can freeze homemade tater tots for up to 3 months. Flash freeze the raw tots on a baking sheet first. Once solid, transfer them to a freezer bag. When you are ready to eat, preheat the oven to 425°F and bake from frozen for 35 to 40 minutes. No need to thaw them first.
To reheat leftover baked tots, use the oven or an air fryer. The microwave makes them soggy. If you have an air fryer, cook them at 375°F for 5 to 7 minutes. They will come out crispy again, just like fresh.
Conclusion
Making homemade tater tots in the oven is one of the easiest kitchen wins you can achieve. You get a healthier, tastier, and more satisfying snack without any special equipment. The process is simple: boil, grate, squeeze, season, shape, and bake. Each step is quick and straightforward.
Once you try these crispy homemade tater tots, you will wonder why you ever bought the frozen kind. They are golden, crunchy, and full of real potato flavor. You can customize them with any herbs or spices you love. They are perfect for parties, game days, or a simple weeknight snack.
Give this recipe a try this weekend. You will be amazed at how easy it is to make oven-baked tater tots that taste better than anything from a box. Your family will ask for them again and again. Enjoy the process, and savor every crispy bite.
Frequently Asked Questions
Can I use sweet potatoes for homemade tater tots?
Yes, you can, but the texture will be different. Sweet potatoes are moister and sweeter. Add an extra tablespoon of cornstarch to help them hold together. The flavor is delicious with a pinch of cinnamon and a drizzle of honey.
How do I keep my tater tots from falling apart?
The key is squeezing out excess moisture and using enough starch. If the mixture still crumbles, add another egg or a bit more cornstarch. The dough should be moist but not wet. It should hold when you squeeze it in your hand.
Can I bake homemade tater tots on a wire rack?
Absolutely. A wire rack set over a baking sheet allows air to circulate underneath. This helps them cook evenly and get crispy on all sides. Just place the formed tots on the rack and bake as directed.
What is the best way to reheat leftover oven tater tots?
Use an oven or air fryer. Spread them on a baking sheet and bake at 400°F for 5 to 8 minutes. The microwave will make them soft and soggy. The oven or air fryer restores the crispiness perfectly.
How long can I store homemade frozen tater tots?
You can freeze them for up to 3 months. Flash freeze them first on a tray, then pack them in an airtight bag. Label the bag with the date so you use them while they are still fresh.
Are homemade baked tater tots healthier than fried ones?
Yes, they are significantly healthier. Baking uses a fraction of the oil compared to deep frying. You also avoid the acrylamide that forms in fried potatoes at very high temperatures. You get all the flavor with much less fat.